


 Ask Sencha AI
Unlock the power of ChatGPT to Master JavaScript Coding (Ext JS Projects)
March 4, 2024
3573 Views
Get a summary of this article:

Introduction
Learning a new framework can have its own set of difficulties. In this post, we will go through the basics of using Chat GPT as a learning tool to help us create our own web applications.
We will be using Chat GPT 3.5 and Ext JS 7.6; However, this will work with previous versions. While it is possible to take advantage of Chat GPT in several phases of your development stack, we will focus on creating the most common components: Grids and Charts.
Requirements
To work with this example, I recommend you buy and download a commercial version of Ext JS, but you are free to use the trial version: https://www.sencha.com/products/extjs/evaluate/. Also, create a Chat GPT account at https://chat.openai.com
Although you can work with a new project from scratch, we will create a simple template. To do so, you need to navigate to the folder where your project will be hosted, and use one of the following commands:
Professional or Enterprise
sencha -sdk ..\ext-7.7.0\ generate app classic MyApp .\MyApp
being ..\ext-7.7.0\ the folder where you have your Ext JS sdk
Trial
sencha generate app –ext MyApp ./MyApp
Improve your prompts
Before we start, there are few things to be aware of.
Version
While not required, to make sure you get the best results, specify the version of Ext JS you want to produce code for. While it may sound like a good idea to always ask for a specific version, it works best if you leave it a little bit open.
Using Ext JS 7 generate an example of a pie chart
or
Using the latest version generate an example of a pie chart
Toolkit
Also, not required, Chat GPT tends to create examples using the classic toolkit. To avoid possible problems, it is best to specify the toolkit, at least, in the first prompt.
Tips and Common Issues
Results come from the Internet, which will create examples that mix code from different sources, which will quite likely produce incorrect results. The most common issues are:
- Incorrect class name and namespace.
- Incorrect or missing data store name.
- The requires array is almost always incomplete or non-existent.
- It may create an object instead of defining a new class.
- If what was created is incorrect, try again.
- Keep everything in one chat.
- While it is compelling to try to get everything from one prompt, you will gain more control if you use separate prompts to generate each class.
Building Data
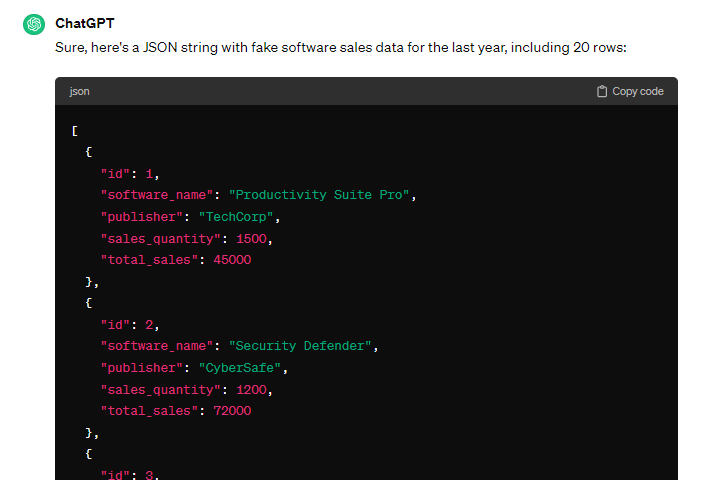
To get started, we will be creating a Json file with the data that will be used in all our examples. This will be our first prompt.
| Create a json string with fake software sales for the last year, include 20 rows, and include the following fields: id, software name, publisher, sales quantity, total sales |
Sometimes, this will give us generic names like “Software 01”, if that happens, either try again, or add the instruction “use real sounding software names”.
We can be more specific and give ranges, by either changing the original prompt, or using the memory of Chat GPT by requesting changes:
| Generate the previous json, but keep total sales between 300000 and 1000000 |
The following step would be to create a data folder in our project and create a json file with the generated data. We need to create a folder and create an empty Json file.
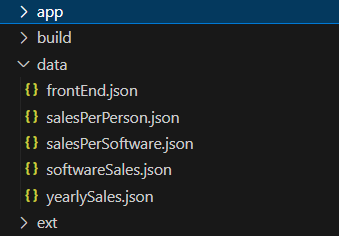
You can give this file any name you want, but I’ll call it SoftwareSales.json. We will load data using an Ext JS Data Store, which means we need to modify the Json string a little bit. Make sure it includes the properties: success and count. If this data had been loaded from a different backend technology, you would have to add the property success to tell the front end the query was successful, and count as the total count of rows in the db (to be used for paging).
The file would look somewhat like this:
| {
“count”: 20, “success”: true, “data”: [ // INSERT HERE THE DATA CREATED WITH CHAT GPT ] } |
Stores and Models
The way Ext JS connects to the backend is by using Data Stores and Data Models. The data store specifies the connection to the back end, and it is where the data will be stored once retrieved. The data model specifies the details of the fields/columns that will be loaded from the backend. Usually, I would prompt for the model and the store separately, but for this example I asked for both.
| How do you define a store and a model class in Ext JS for the previous json file |
This will generate both the store and the model classes. There are a few things that we will have to fix and/or ask Chat GPT to fix. Let’s see the results:
Model
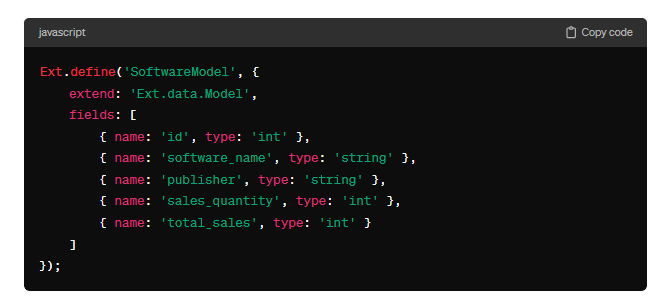
The model class was defined almost correctly, but there are a few things that we need to check or correct.
- 1) We should first check the Ext method, we are looking to define, not create a class. This time, Ext.define is the correct method, but sometimes, the prompt will generate an Ext.create instead. Be sure to modify it accordingly.
- 2) Second, let’s go ahead and fix the class name, it should follow a specific format: AppName.model.ClassName, in this project, it would be MyApp.model.Sales
Data Store
The previous prompt will also generate the store. As you will notice, the result we got, is not what we expected.
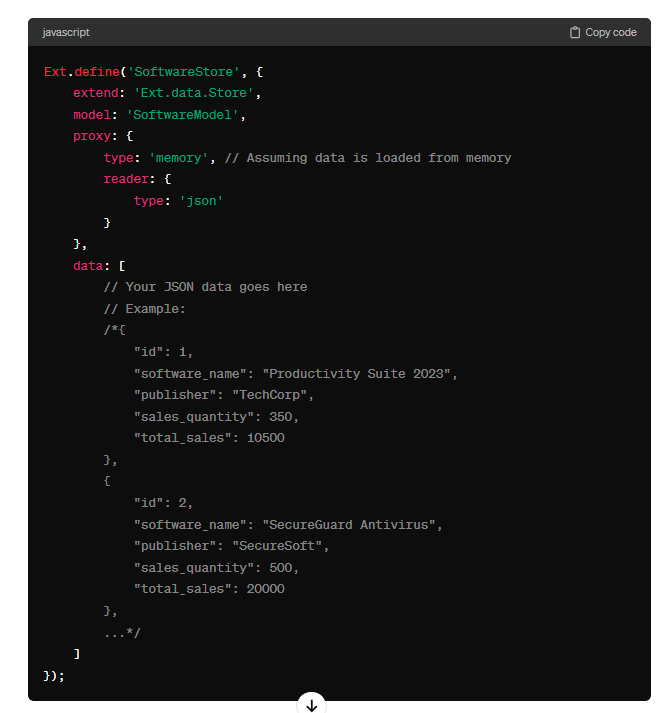
It created the store with the hard coded version of the data. We can easily tell because it is using the data property, and the type is set to memory. Instead of fixing the issue ourselves, we are going to ask Chat GPT to fix it for us.
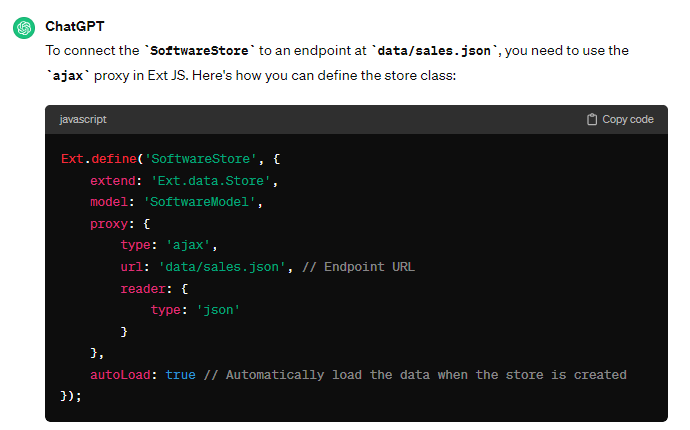
| Define the previous store class, but connect to an endpoint at data/sales.json |
With this new prompt, the store class will be corrected, and will include what we need. It replaced the type of “ajax”, removed the data array, and added the proxy url. Just make sure you specify the actual file name.
Just like with the data model, don’t forget to change the class name to match your project: ‘MyApp.model.SalesData’
Updating the Navigation
Now that we have our data and data store ready, it is time to create our view and update the navigation. This step and the following step are interchangeable since we need both to test our project.
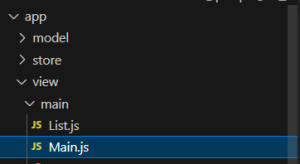
Navigate to the Main.js file inside the view/main folder, it is here where we will modify the navigation menu. For each file you link from the navigation menu, you will need to add the file to the requires array, and to the items array.
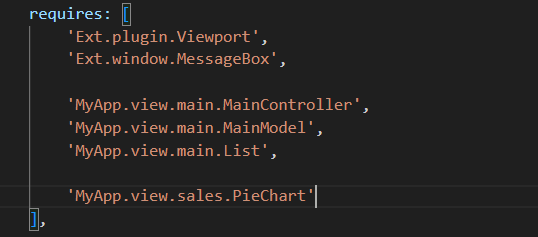
Inside the requires array, you will need to add the Class name, for example, ‘MyApp.view.sales.PieChart’.
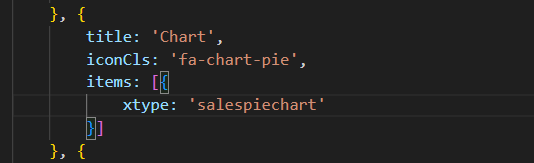
Inside the items array, you will need to link to the xtype of the same class, for example: ‘salespiechart’.
These steps have to be done for every view you want to add to the Menu. This applies to the Ext JS basic template, if you are using any other template, different steps would apply.
Creating a Chart
While Chat GPT can create different types of Ext JS Charts, we will be creating one of the most common: pie chart. But you can certainly go ahead and ask for a different kind of chart.
| Create an Ext JS pie chart by using the previous store, and use software_name and sales_quantity |
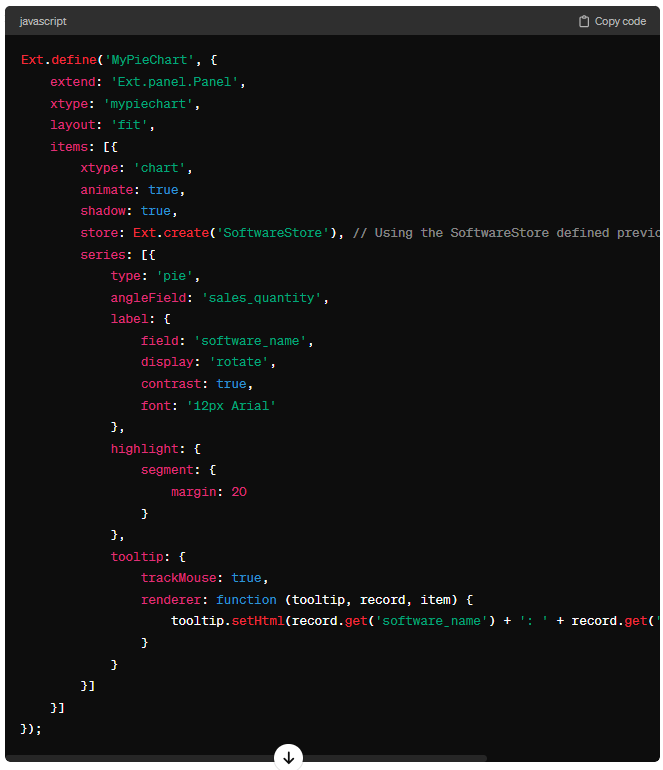
The generated chart will probably share the same issues as the previous examples. So, make sure you review the class name, the xtype, and the store. But the most important mistake Chat GPT committed was the fact that it called the xtype chart instead of polar.
You also may want to go in and change the tooltip and default color scheme.
| Ext.define(‘MyApp.view.sales.DashboardPie’, {
extend: ‘Ext.panel.Panel’, xtype: ‘dashboard-pie’, layout: ‘fit’, requires: [ ‘Ext.chart.theme.*’ ], items: [{ xtype: ‘polar’, animate: true, shadow: true, store: { type: ‘salesdata’ }, theme: ‘blue’, insetPadding: 48, series: [{ type: ‘pie’, angleField: ‘sales_quantity’, label: { field: ‘software_name’, display: ‘rotate’, contrast: true, font: ’12px Arial’ }, style: { strokeStyle: ‘transparent’ }, tooltip: { trackMouse: true, renderer: function (tooltip, record, item) { tooltip.setHtml(record.get(‘software_name’) + ‘: ‘ + record.get(‘sales_quantity’) + ‘ sales’); } } }] }] }); |
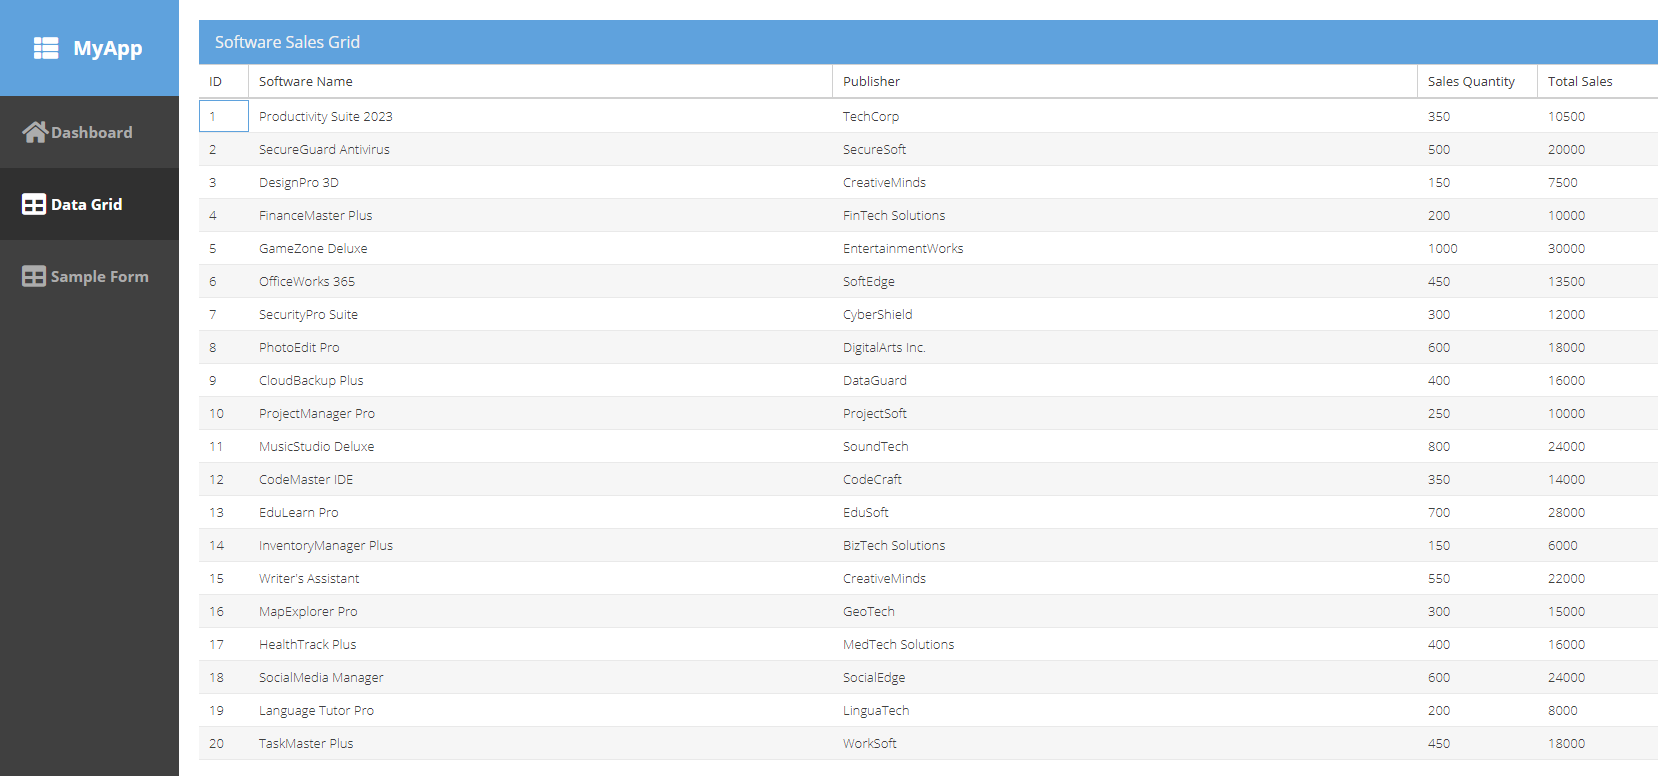
After all those fixes applied, it should look something like this:

Displaying information in a Grid
We will now proceed to create a simple grid with the same data. By now we should be aware of the most common mistakes.
| Using the previous json string, define an Ext JS grid |
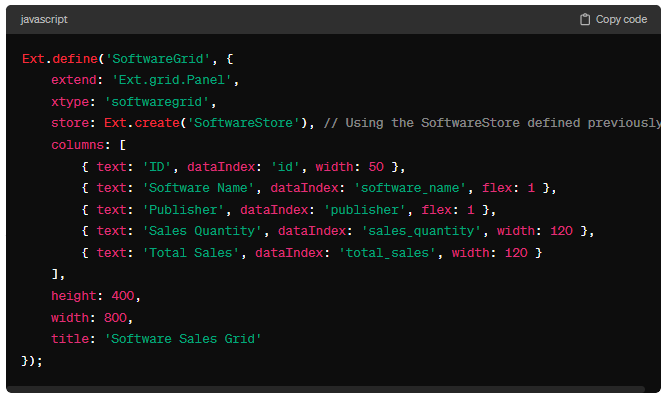
Make sure to change the Class name, review the xtype, and if necessary, change the store.
After the class is fixed, go to the main.js file and add it to the navigation.
One of the greatest things about Ext JS is that sorting is already setup. Although outside of the scope of this document, adding filters and pagination is a couple of lines away.
The legality of using AI tools
We are using Chat GPT as a guide and learning tool. I highly encourage you to create your own code, and just use Chat GPT as a guideline for your projects. It is not part of this document to discuss the legality of using AI tools; However, here are some considerations to follow:
- Intellectual Property Rights.
Beware of generated code, it may be similar to existing copyrighted code and could violate copyright laws or infringe patent rights.
- License Agreements.
Software libraries or frameworks may have license agreements of their own. Make sure to read and review each vendor’s license agreements.
- Liability.
Not reviewing the generated code and using it in safety-critical or financial applications may result in legal consequences due to errors or vulnerabilities.
- Data Privacy and Security.
If you will be processing sensitive data, you must ensure compliance with data protection laws and regulations.
- Ethical Considerations.
According to Chat GPT code generation is legally permissible but be sure to consider ethical considerations. If you use an AI tool, be transparent to your users and team.
As a rule of thumb, if you are using code from a third party, always check with your legal department.


Latest Content

UI Framework vs UI Component Library: Why Enterprise Teams Choose Complete Solutions in 2026
UI frameworks provide complete application architecture with built-in components, routing, and state management, while component…
May 25, 2026

The Future of Front-End Frameworks: 2026 Trends Every Developer Should Know
Front-end frameworks in 2026 prioritize enterprise stability over rapid innovation. Performance requirements have intensified with…
May 25, 2026

Front-End Frameworks Compared in 2026: Performance, Use Cases, and Trade-offs
Front-end framework selection in 2026 centers on three critical decisions: complete platform versus ecosystem assembly,…
May 22, 2026


